

15+ Simple Designs for Nail Art Step By Step (With Images) 2024

The festive season is approaching and it’s time to look good and also decorate our nails. I know this time it’s not possible to go out and have our nails done. Therefore, we have brought to you Simple designs for nail art. These are the designs which you can easily try at home and get successful results. So, this festive season gives your hands a different and beautiful look with these amazing nail art designs.
Check out the blog-
15 Simple and Easy Nail Art Design for Beginners
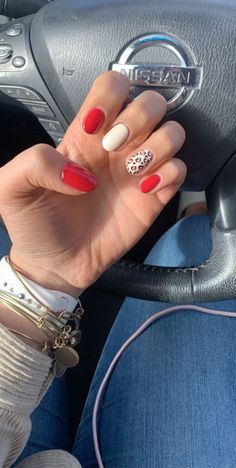
1. Dual Tone Nail Design-
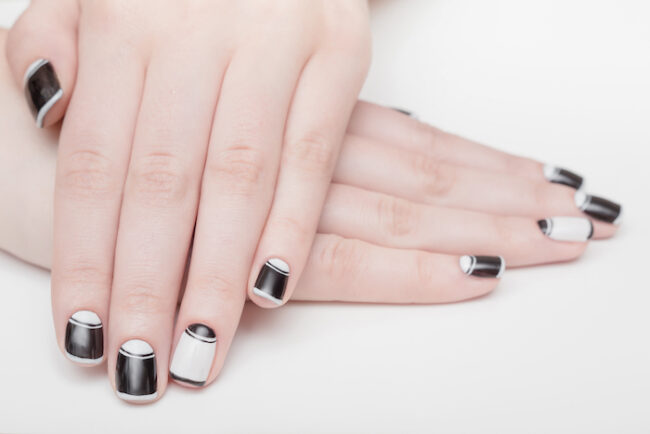
This is one amazing nail design that you can carry anywhere. You can style your nails like this for any daytime function or even nighttime function. You can choose any two colors that you want in this design.
How to do:
- First, apply black coloured nail polish on all your fingers except the middle one of both hands.
- Apply white coloured nail polish on your middle fingers.
- Then according to your design cut the scotch tape and stick it on nails.
- In the area, left uncovered apply the other nail paint.
- Pull off the scotch tape.
- Secure your nail design with clear nail polish.
2. Galaxy Nail Art Design-
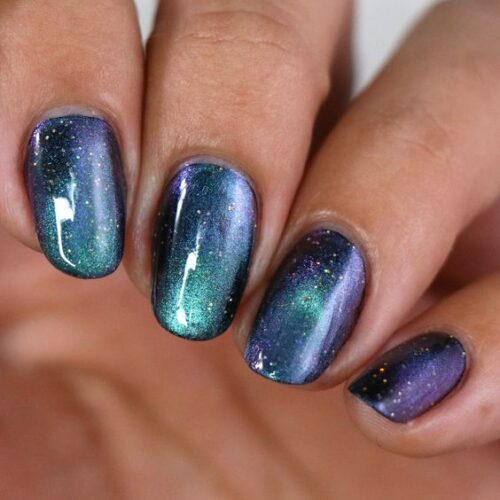
If you are a fan of the sky, stars, and galaxy, this is your nail art design. It looks different and unique. And also this Galaxy nail art design will give you a true star fan tag.
How to do:
- Apply black coloured nail polish on all your nails.
- Let the nail polish dry, again apply the black colour.
- Now, on a clear plate take a drop of blue colour, purple colour and white colour nail polish.
- Take the colour in the sponge and dab it on the nails.
- Let the design dry and then apply clear nail polish.
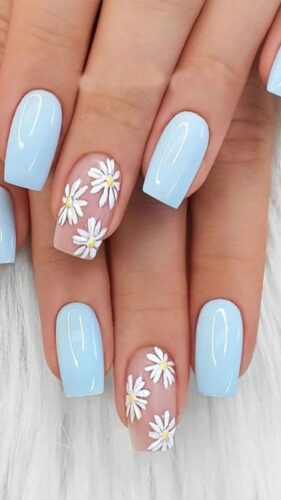
3. Clouds on the Nail-

How about these beautiful and cute clouds on your nails. You can match your attire with this colour and the nail art will add to your beauty.
How to do it:
- Paint all your nails with simple blue colour.
- Now with the help of white colour, draw a cloud design on your nails.
- Let the design dry. Give it a finishing touch with clear nail polish.
4. Simple and Unique Design-
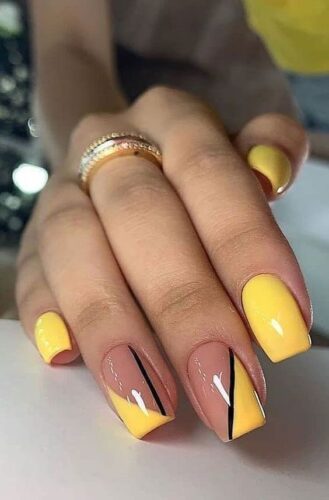
What would you say about this Gorgeous and cute nail art? Again, you can take any two of your fav. colors in the design and it will be like a compliment to your whole look.
How to do it:
- Apply scotch tape on two of your fingers, on which you want the design.
- Choose a colour and apply it on your fingers say Yellow colour.
- Remove the scotch tape and draw two black lines on your nails.
- Finish off the nail art design by applying clear nail polish.
5. Easy Fall Design Nail Art-
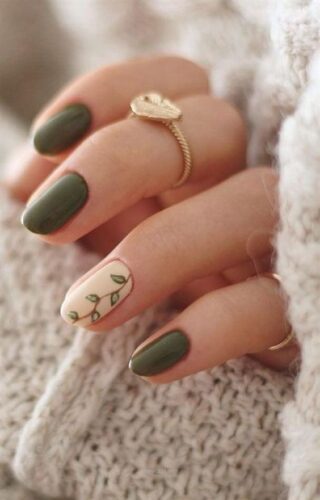
I love the colors used in this nail art design, they are so subtle and gives a classy feeling. And the design of leaves on one nail has made the nail art more beautiful and unique.
How to do it-
- Paint your nails with green matte finish nail polish, leave one finger to draw the nail art design.
- Draw the leaf pattern design on the remaining finger with the help of a toothpick.
- Secure the design with transparent nail polish.
6. Rainbow Design-
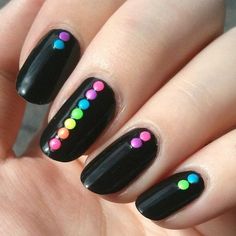
This black bold design nail art really brings out your charismatic personality. Also, the design will go with any dress and function.
How to do it:
- Put black colour nail polish on your nails and let them dry.
- Again apply the nail polish a second time.
- Take a plate and drop all different types of colours in it.
- With the help of a toothpick draw the dots and give it a rainbow look.
- After it gets dried, cover the design with transparent nail polish.
7. Leopard Print Nail Art-
This hot chic nail art design is really amazing and gives you a bold look too.
How to do it:
- Take the colour of your choice.
- Apply it to three of your fingers.
- Draw a leopard print on one and a different colour on the other.
- After the design gets dry, secure it with transparent nail polish.
8. Simple Black Line Nail Art-

A pretty simple nail art design for short nails and beginner’s like me. Just like the image you can match your nail art design with your eyeshadow to give it one different look.
How to do it:
- Apply your fav. colour nail polish on all fingers.
- With the help of a toothpick, draw a zig-zag line on your fingers.
- After the design gets dried, apply transparent nail polish on your fingers.
9. Beach Nail Art-
How calm and beautiful this nail art design looks. A perfect design for any beach wedding or beach vacation.
How to do it:
- Chose the beautiful and calm blue colour nail polish.
- Apply it to all your fingers, except one and let it dry.
- Put on the transparent nail polish on the remaining finger.
- Draw flower design with the help of a toothpick.
- After it gets dried, apply transparent nail polish on it.
10. Neon Nail Art-
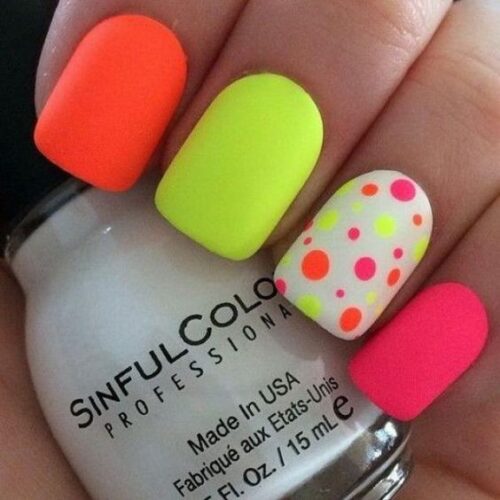
Not many women like the neon nail art design. But they are really apt for an afternoon party or your brunch.

.png)

0 Comments